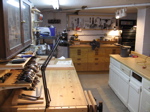
New Shop Cabinets with Bench Top
When setting up a workshop, large or small, I heartily recommend looking around for used cabinets. Auctions and Habitat for Humanity ReStores always have older, but perfectly functional cabinets on the cheap. Sometimes extremely cheap. Using these cabinets initially to outfit your shop gives you the opportunity to organize your tools and storage and keep the dust off while you're still learning about woodworking. This approach will also help you avoid one of the big pitfalls of setting up shop: building the wrong cabinets, in the wrong places and for the wrong purpose. If you dive right into custom shop cabinetry, you don't yet know how your personal "flow" will work out. If you're just starting out, you don't know yet the work habits you'll develop. Only as you piddle around in your shop, will you discover what works well for you as far as cabinet positioning and configuration goes. (I picked up this cabinet from the side of the road for free and this workbench for $12.50, this cabinet/cart for $7.50, and this cabinet for $25.)
Instead, by using discarded and used cabinets, you can set something up quickly, rearrange and modify it easily without worrying about messing up your own handy work, and learn how your future custom cabinets will need to be built. Again, I just can't stress enough the benefits of going this route. Give it some serious thought.
All that being said, here's how things fleshed out in my own situation. After using reclaimed cabinets throughout my shop for about a year and a half, I came to an understanding about what I wanted to build for myself.
To begin, I decided to take the time and set up infeed/outfeed tables with my table saw. It can be very difficult, not to mention very dangerous, to work with 4x8' plywood alone. Setting things up as shown in the first few pictures below made things much easier. Take the time to do this! You won't regret it. In the third picture, you can see all of the cabinet box parts cut as well as a few for the benchtop shelf.
Instead, by using discarded and used cabinets, you can set something up quickly, rearrange and modify it easily without worrying about messing up your own handy work, and learn how your future custom cabinets will need to be built. Again, I just can't stress enough the benefits of going this route. Give it some serious thought.
All that being said, here's how things fleshed out in my own situation. After using reclaimed cabinets throughout my shop for about a year and a half, I came to an understanding about what I wanted to build for myself.
- I don't like lower cabinet shelves with doors. They force me to move things around in front to see whats behind. So, drawers seem like a good fit for my setup.
- I need lots of storage and drawers of different heights.
- I like one main bench with lots of light where I do most general handy work, tool cleaning and sharpening, etc.
To begin, I decided to take the time and set up infeed/outfeed tables with my table saw. It can be very difficult, not to mention very dangerous, to work with 4x8' plywood alone. Setting things up as shown in the first few pictures below made things much easier. Take the time to do this! You won't regret it. In the third picture, you can see all of the cabinet box parts cut as well as a few for the benchtop shelf.
Next, you'll see the box-building "jig" I used to help with the assembly of the cabinet boxes. This was recommended in the plan and I'm really glad I took the time to build it as well. I highly recommend it. It will save you hours of frustration.
Finished at last. I love them. In fact, I think I might like a 3x run of them (9 banks of drawers) if I ever have a larger shop one day.


